Photographing Movement – Stationary Camera With A Variety of Shutter Speeds

Nikkor 1/1.8:50 AF-D; f22; 1/8th sec
Joggers, cyclists and dog walkers are found in abundance in the parkland that stretches down the Lea Valley from Tottenham Hale to the Lea Bridge Road. It seemed a good choice for the exercises featuring movement at varying shutter speeds. For the series taken with a fixed camera, I set up a Nikon D50 low on a tripod, pointing up the long stroke of a T-junction. The camera was triggered using an infrared remote. I used a 50mm lens, capable of stopping down to f22 as this would give me the widest possible range of slow speeds on what was a very bright day to be using a camera with a lowest ISO of 200. The resulting shots cover a range from 1/8th of a second to 1/400th of a second.
1/8th sec – runner

Nikkor 1/1.8:50 AF-D; f22; 1/8th sec
Almost melts into the air, leaving an elongated series of brushstroke-like traces as he goes. good for a highly abstracted sense of movement. His grounded foot remains stationary for the time the shutter is open (and will only begin to move as his trailing leg moves past it and the heel starts to rise) meaning that the Nike swoosh on his running shoe is the only fully identifiable part of him.
1/15th sec – runner
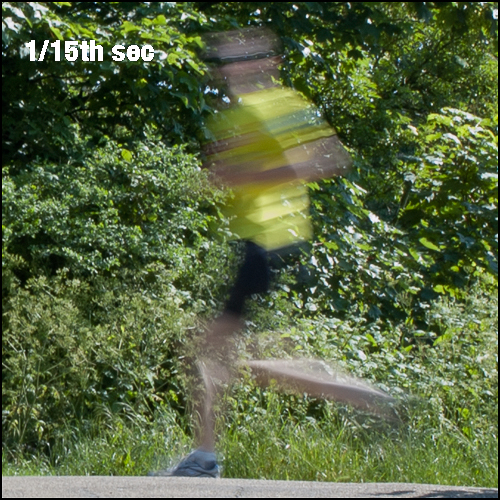
Nikkor 1/1.8:50 AF-D; f22; 1/15th sec
A more identifiably human presence – you can tell that a man in a yellow top and black shorts, wearing sunglasses has looked to his left as he passes the camera. He has been caught at a different point in his stride from the previous shot and his grounded foot has started to move although his trailing leg is less elongated. Against a more neutral background I think this would work nicely.
1/30th sec – Runners
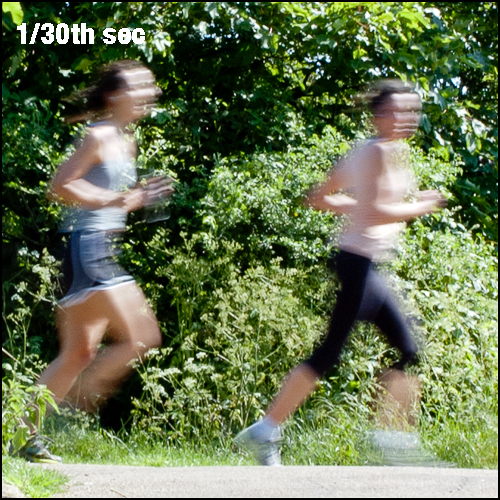
Nikkor 1/1.8:50 AF-D; f22; 1/30th sec
Neither figure is as pleasingly caught and blurred as in the previous shot, but the leading woman is the better of the two as she is further from the point where the two legs and arms cross the body rather than stretching out in front and behind. Gauging a shutter speed appropriate for the speed of movement is important, but so is timing relative to the stage of the action photographed.
1/60th sec – runner
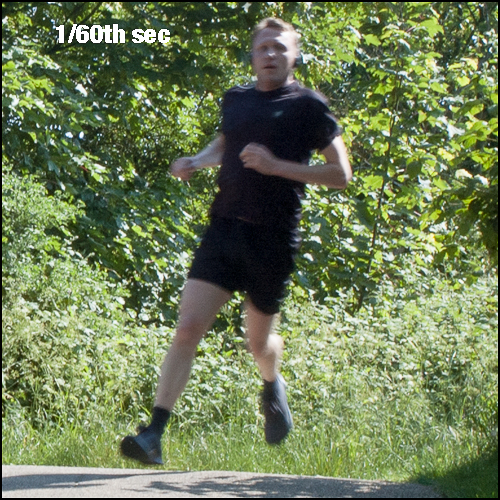
Nikkor 1/1.8:50 AF-D; f22; 1/60th sec
He is crossing into the frame around the corner, rather than parallel to the plane of the sensor and so his relative movement is therefore less, and the effect is simply that he is out of focus. This creates a slightly troubling effect given that there are objects both behind him and between him and the camera that are firmly in focus. Given that his feet are both off the ground, this particular shot might have worked better with a much shorter exposure leaving him hanging frozen in mid air…
1/125th sec – walker

Nikkor 1/1.8:50 AF-D; f22; 1/250th sec
She is moving more slowly than he is but like the runner above she is simply a bit soft within a sharp frame. Presumably she has covered a similar distance relative to the camera plane. The timing of the exposure relative to her movement is nice however – she is obviously mid stride.
1/250th sec – walker with dog
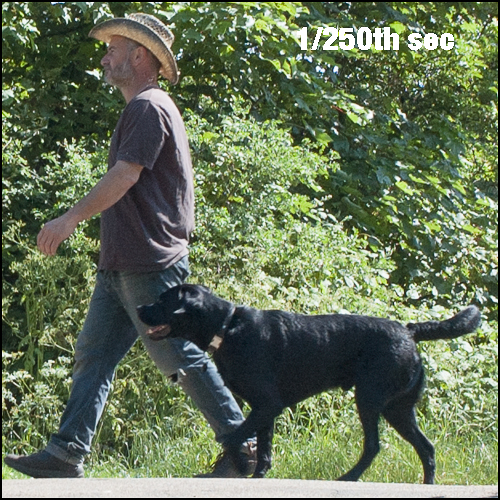
Nikkor 1/1.8:50 AF-D; f22; 1/250th sec
Pretty much frozen, apart from the dog’s front-left paw. Not bad.
1/400th sec – walker with dog

Nikkor 1/1.8:50 AF-D; f22; 1/400th sec
Frozen, but not as nicely timed as the previous shot; the man’s okay but the dog’s legs are a bit of a mess in timing terms.
Conclusions
Different speeds of movement will require different exposure times to get the desired effect. Similarly, different directions of travel relative to the camera will effect the impression of movement. Timing the shot relative to the stage the subject’s movement has reached is also important. There is an area between extreme motion blur and frozen that is less successful than either extreme, for movement involving legs at any rate. In every new situation, you will probably need to experiment a bit before you determine where the sweet spots are, based on time, direction of movement and the desired effect. I suspect it would be good to revisit Muybridge’s work…
The last 3 pictures feature a couple and their labrador who wondered what I was doing and then – after I explained – offered to do the last few passes, saving me some time waiting for someone to turn up naturally. Thank you, anonymous couple – I realise I should probably have got their names, and let them know somewhere where they would be able to see the pictures, like here!

Pingback: getting to know your camera # 5 | Simon Chirgwin's Learning (B)Log